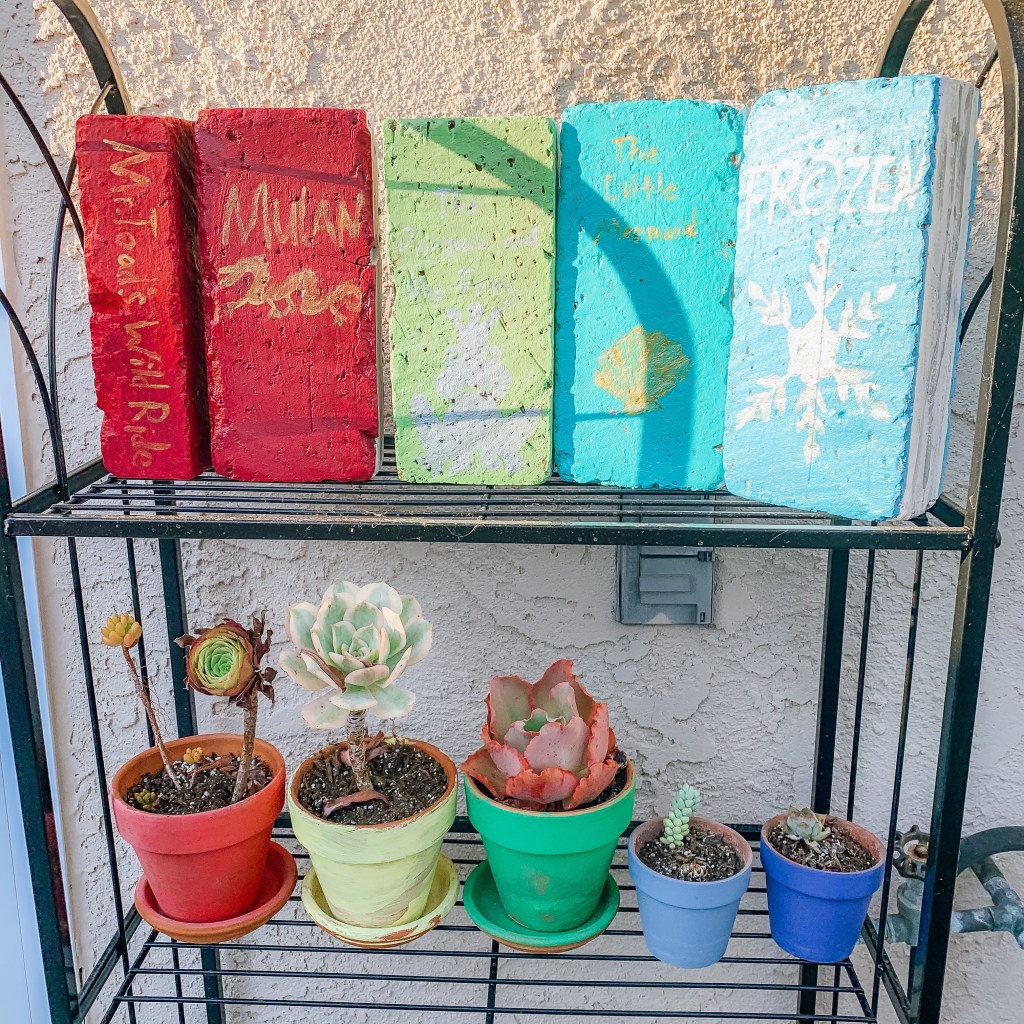
Recently, I reorganized my patio garden, and found myself with some old and weathered bricks. A quick look online gave me plenty of fun ideas. I immediately fell in love with the notion of painting the bricks to look like old books. I asked my daughter Talia if she wanted to help, and she decided that we should create our own brick library of Disney classics. While we aren’t finished yet, I wanted to share our creations so far.
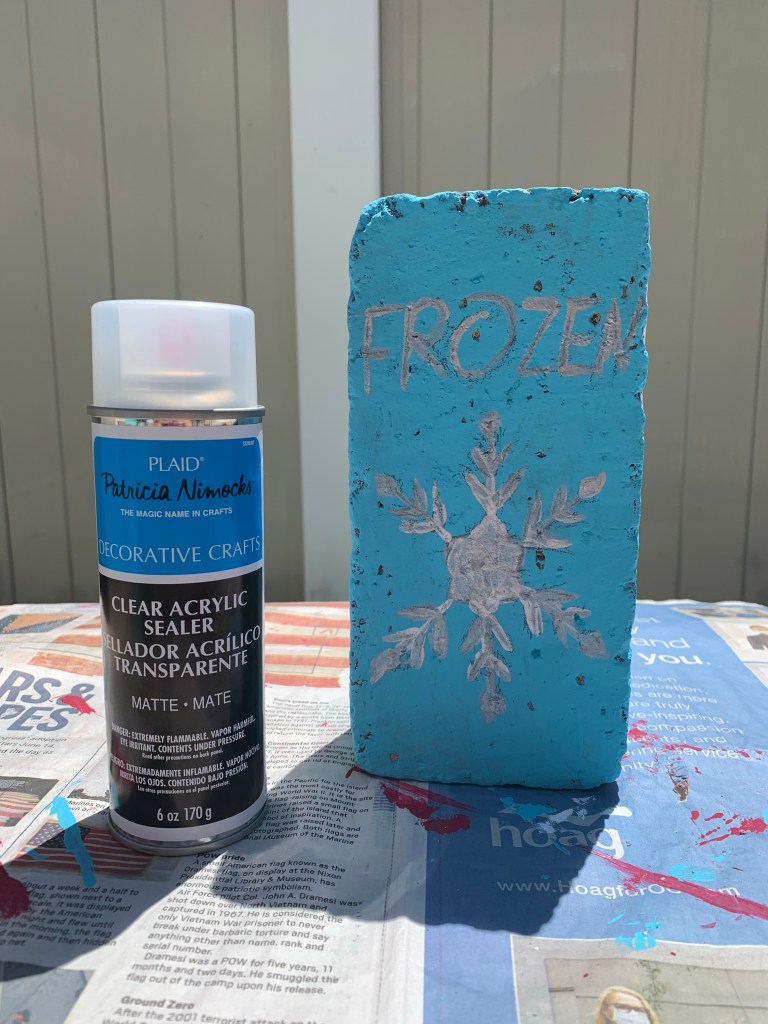
I let Talia choose the stories and color schemes for each brick. Most of her requests are her favorites that I expected (Frozen II and The Little Mermaid) but I was surprised that she insisted on making one entitled “Mr. Toad’s Wild Ride.” I explained to her that this isn’t the name of Mr. Toad’s story, but five-year-olds can be pretty persuasive and I let her have the win.
By the way, I freely admit that I am not a trained artist by any stretch of the imagination. The fun part about this project is that imperfections look better! The bricks are uneven and a bit chipped, so it makes sense that the “pages” and “cover” look damaged and worn.

Here is the supply list and directions for creating your Magical Painted Brick Book library:

Supplies:
-bricks (any size, condition)
-acrylic paint
-paintbrushes (some thick and some thin)
-paint palette or paper plate
-newspapers, tablecloth, or butcher paper (to protect your table)
-clear acrylic sealant (spray preferred)
-pencil
-ruler (or cardboard with straight edges)
Directions:
Step 1: Thoroughly clean and dry your bricks. Cover your table or workspace with newspapers or something else to protect it.
Step 2: Paint three sides of your brick with the “cover” color. If you imagine a real book, you are painting the front cover, back cover, and spine.
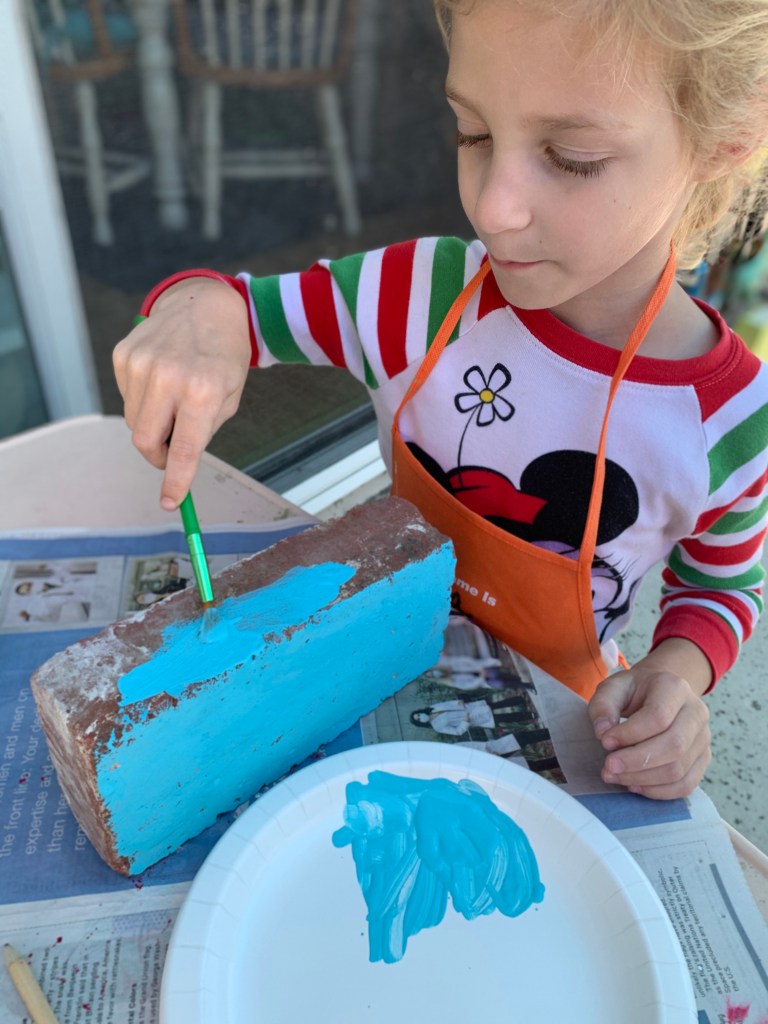
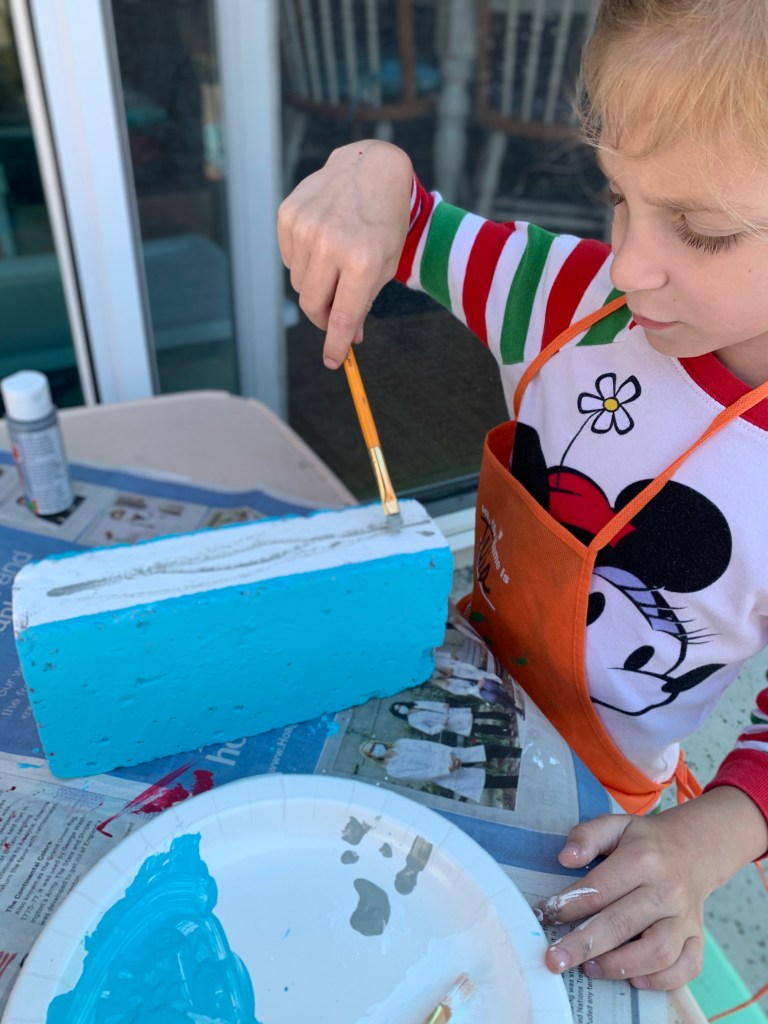
Step 3: Paint the remaining three sides white or off-white. These will be the pages, you can use a beige or yellowed color if you’d like your brick book to look more like an antique.

Step 4: Wait for all the white sides to dry completely. Using a ruler, paint thin straight lines along each edge of the white sides using the cover color. This is supposed to look like the cover is overlapping.

Step 5: Allow the edges to dry completely. Using gray, black, or even yellow paint, gently paint thin lines vertically along with white side to simulate the pages in a book. If your lines look too thick, go back with the white paint to create thin white lines and “separate” the pages. There is no right or wrong way for your pages to look as long as you’re happy.
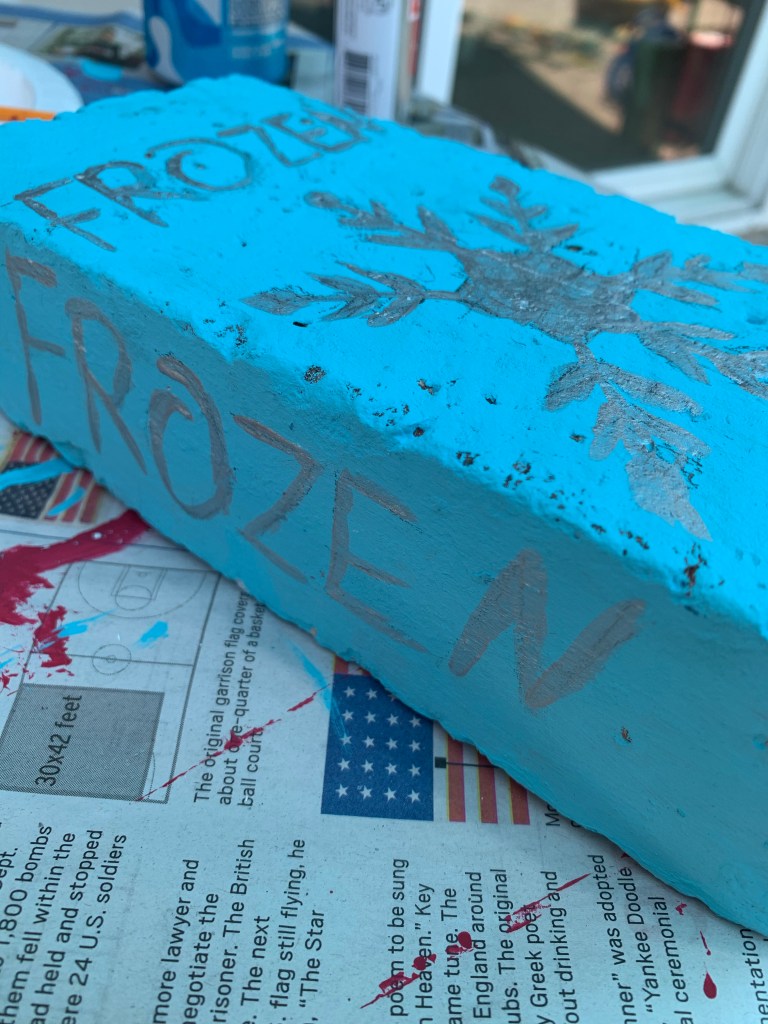
Step 6: Select your front cover and lightly sketch the book title in pencil. My daughter requested that I draw a symbol for each book as well. Sketch the title on the spine of the book too.

Step 7: Paint over your pencil sketchings with metallic acrylic paint. You could use a metallic sharpie or marker instead of metallic paint, I just used what I had on hand.

Step 8: Allow all of the paint to dry completely, you can also go back over anything you’d like to fix if the paint was smudged or dripped.
Step 9: In a well-ventilated area (outside or in a garage), put your brick down on newspaper or butcher paper. Spray it completely with clear acrylic sealant, you will have to wait for the first 5 sides to dry before you spray the last side. Coat it evenly, being careful not to create drips. Allow the sealant to dry completely and apply a second coat if needed.
Step 10: Use your bricks to decorate your garden or as bookends. Be careful to place them up out of reach of little hands if you’re keeping them inside.
TIPS:
-You can always go back and paint over mistakes, so don’t stress!
-If your little artists have trouble keeping the paint flat, go back and smooth out the paint with a clean brush while it’s still wet.
-The pencil sketches and painting over them were too difficult for my daughter. Adults will probably need to do those steps or help with younger children.
-Have fun and get creative! The possibilities are endless for this project. You could recreate literary classics, biographies of famous historical figures, or even spell out a name using a single decorative letter on each step.

I’ll be sure to update when we have completed our library, please let me know what books you create at home!
